The Digital Blueprint: A Comprehensive Guide to CAD File Formats for CNC Machining
- Introduction: The Unseen Foundation of Modern Manufacturing
- Part 1: Deep Dive into CAD File Formats and Their Applications
- Neutral File Formats: The Universal Language
- Native File Formats: The Power of Detail
- Part 2: Advanced Challenges and Systematic Solutions in CAD File Conversion
- Challenge 1: The “Distortion” and “Loss” of Geometric Features
- Challenge 2: Surface Gaps and “Non-Manifold” Issues
- Challenge 3: The “Collapse” of Assembly Structures
- Challenge 4: The “Mess” of Units and Dimensions
- Challenge 5: Loss of Non-Geometric Information
- Part 3: Conclusion and Best Practices: Building a Seamless CAD-CAM Workflow
Introduction: The Unseen Foundation of Modern Manufacturing
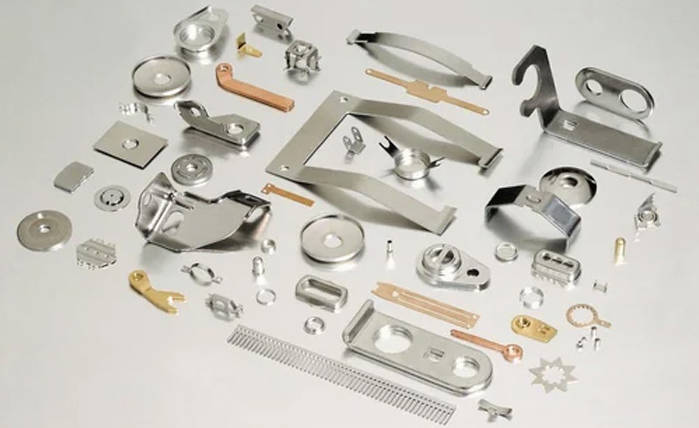
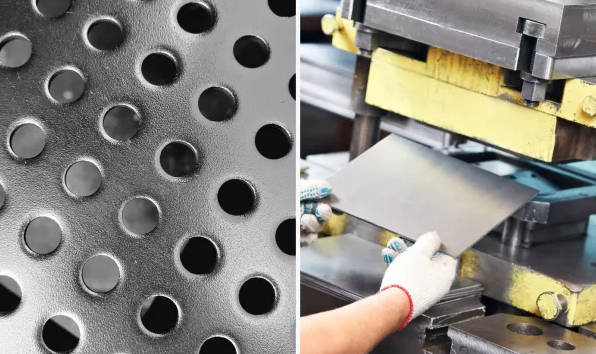
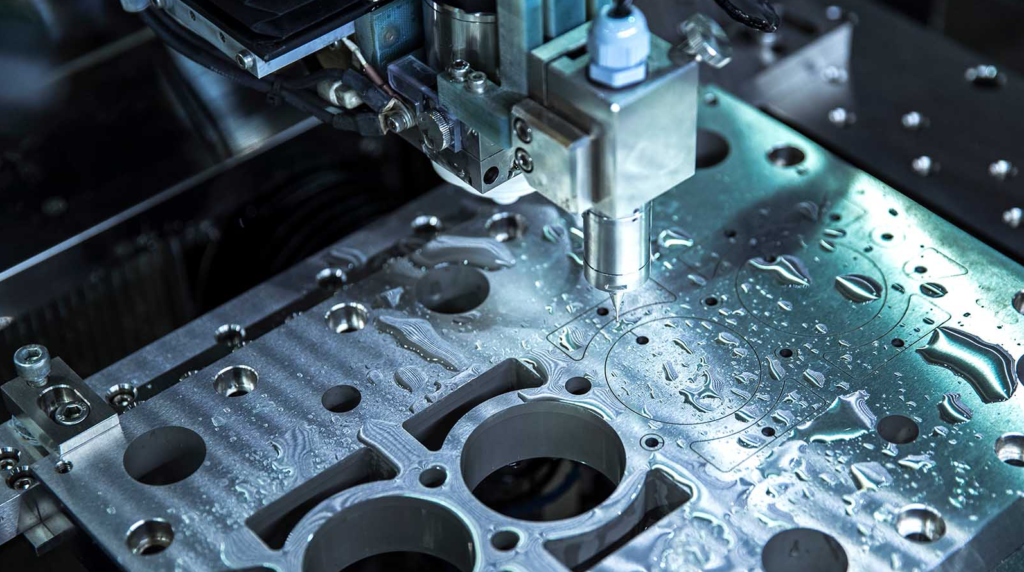
In the world of modern manufacturing, where precision and efficiency are paramount, what is CNC machining? It’s a cornerstone of production, a process that relies on computer-controlled tools to shape materials with incredible accuracy. Yet, the true power of this technology lies not in the machines themselves, but in the digital instructions they follow: the CAD (Computer-Aided Design) file. This file is more than just a drawing; it is the definitive digital blueprint, a comprehensive set of instructions that dictates every cut, curve, and dimension of a finished part.
CNC machining stands for Computer Numerical Control machining, a manufacturing process that uses pre-programmed computer software to dictate the movement of factory tools and machinery. It enables the creation of highly complex and precise parts from a wide variety of materials, from metals to plastics. A flawless CAD file is the essential first step in ensuring a successful production run, whether it’s for aerospace cnc machining or a simple prototype.
A misstep in file format or conversion can lead to costly errors, production delays, and a final product that fails to meet specifications. For any precision CNC machining company, mastering the nuances of CAD files is not a luxury—it’s a necessity. This article serves as a comprehensive guide, demystifying the various file formats and providing a roadmap of best practices to ensure a seamless transition from a digital design to a physical product.
Part 1: Deep Dive into CAD File Formats and Their Applications
The vast landscape of CAD file formats can be confusing. They fall into two primary categories: neutral formats, designed for universal interoperability, and native formats, which are tied to specific software but contain a richer history of the design process. Understanding the strengths and weaknesses of each is crucial for any project, from cnc prototype machining to large-scale production cnc machining.
Neutral File Formats: The Universal Language
Neutral formats are the lingua franca of digital manufacturing. They’re designed to be a common ground, allowing engineers and manufacturers using different software systems to exchange data without compatibility issues.
STP (STEP)
As the industry standard, STP (Standard for the Exchange of Product model data) is the most widely used and recommended neutral format. It is governed by the ISO 10303 standard, ensuring a high degree of reliability and consistency across different platforms.
- Key Advantages: Universal Compatibility: Virtually every CAD and CAM software, from SolidWorks to Mastercam, can import and export STP files. This makes it the go-to format when you’re sending a design to a china cnc machining service or any external partner. Data Integrity: It efficiently represents solid body geometry, curves, and surfaces with minimal data loss.
- Limitations: STP files typically don’t retain the design history or parametric data (the “feature tree”). This means while a machinist can use the file to cut a part, they can’t easily modify the original design features like a fillet or a hole’s diameter.
IGES
An older, but still relevant, standard, IGES (Initial Graphics Exchange Specification) was one of the first neutral formats. It excels at transferring surface data but can be less reliable for complex solid models.
- Key Advantages: Legacy Compatibility: Useful for interacting with older software or historical projects. Surface Data: Still a viable option for intricate surface models, such as those found in complex automotive or aerospace cnc machining projects.
- Limitations: Prone to gaps and errors in complex solid models, often requiring manual repair in the receiving software.
Here’s a quick comparison of the two primary neutral formats:
| Feature | STP (STEP) | IGES |
|---|---|---|
| Standard | ISO 10303 | ANSI |
| Primary Use | Modern solid models, assemblies | Legacy systems, complex surfaces |
| Reliability | High; minimal data loss | Lower; prone to gaps and errors |
| Data Type | B-rep, NURBS, Assemblies | NURBS, wireframes, surfaces |
| Best For | General purpose exchange, modern workflows | Specific legacy or surface-heavy projects |
Native File Formats: The Power of Detail
Native formats are the proprietary file types of specific CAD software (e.g., SolidWorks’ SLDPRT, ProE/Creo’s PRT). Their primary strength is their ability to preserve the entire design history and parametric data.
SLDPRT, PRT, and Other Native Formats
These files are the heart of the design process. They contain every feature, sketch, and parameter used to create the model. This allows for quick design iterations, revisions, and detailed analysis within their native software environment.
- Key Advantages: Parametric Control: The ability to go back and modify any design step, which is invaluable for prototype cnc machining where designs are frequently revised. Rich Data: They store not just geometry, but also material properties, annotations, and assembly constraints.
- Limitations: Interoperability: These files are not meant for external sharing. A file created in SolidWorks cannot be fully opened or edited in Creo, and vice versa. Sending a native file to a cnc machining china provider using different software will likely result in a failed import or a loss of all parametric data. This is why conversion to a neutral format is almost always required.
SAT & X_T (Parasolid)
While technically proprietary to their respective modeling kernels (ACIS for SAT, Parasolid for X_T), these formats act as a bridge between the native and neutral worlds. Many popular CAD systems are built on one of these kernels.
- Key Advantages: Reliable Geometry: Due to their direct output from the modeling kernel, they are often more robust and less prone to geometry errors than other formats when transferring between compatible systems. Streamlined Workflows: If both the designer and the manufacturer use software based on the same kernel, these formats can offer a smoother data transfer than generic neutral formats.
- Typical Use Case: Precision machining cnc operations often involve complex geometries, and these formats can provide a reliable way to exchange solid models without the risk of surface inconsistencies found in older formats.
The choice of file format is the first critical decision in the CNC machining process. For external collaboration, a robust neutral format like STP is almost always the safest and most reliable option. For internal use and design iteration, a native format is unparalleled.
Part 2: Advanced Challenges and Systematic Solutions in CAD File Conversion
Transitioning a design from a native CAD environment to a neutral format for cnc machining is fraught with potential pitfalls. These issues, if not addressed, can significantly impact the quality of cnc precision machining parts, leading to rework and increased cnc machining cost. A systematic approach to conversion is key to a smooth and predictable workflow.
Challenge 1: The “Distortion” and “Loss” of Geometric Features
- Specifics: Fillets and chamfers may become sharp edges, small holes might disappear, or complex freeform surfaces may lose their intended curvature.
- Underlying Cause: Different software packages and their underlying geometric kernels (e.g., Parasolid vs. ACIS) represent curves and surfaces (NURBS) differently. When a file is converted, the receiving software might misinterpret the data, leading to a loss of detail.
- Advanced Solutions:
- Pre-Conversion Simplification: Before exporting, simplify the model by removing overly complex features that are not critical for the manufacturing process.
- Use “Heal Geometry” Tools: Most modern CAM software and CAD viewers have a “heal” or “repair” function. Use this to automatically diagnose and fix small gaps and surface errors after importing the neutral file.
- Targeted Export: When possible, export specific features or bodies individually and then re-assemble them in the CAM software, which can sometimes be more successful than exporting a large, complex assembly.
Challenge 2: Surface Gaps and “Non-Manifold” Issues
- Specifics: An imported solid model appears to have small, unsealed gaps between surfaces, or overlapping faces. This makes the model “non-manifold,” meaning it’s not a complete, sealed solid. CAM software cannot generate toolpaths for a non-manifold body.
- Underlying Cause: This often happens when the source native file has minor errors that are not apparent to the designer. The conversion process can exacerbate these tiny inaccuracies, turning them into noticeable gaps.
- Advanced Solutions:
- Analyze Before Export: Use built-in analysis tools in your CAD software (e.g., SolidWorks’ “Check Entity” or Fusion 360’s “Inspect” functions) to check for open edges or bad geometry before conversion.
- Manual Patching: In the receiving CAM software, use surface modeling tools to manually patch and knit together the broken surfaces. This can be time-consuming but is often the only way to salvage a problematic file.
- Utilize Kernel-Specific Formats: When both the sender and receiver’s software use the same modeling kernel (e.g., both use Parasolid), using formats like X_T can significantly reduce the risk of these issues.
Challenge 3: The “Collapse” of Assembly Structures
- Specifics: An assembly composed of multiple parts is imported as a single, monolithic body, losing all individual part data and their relative positioning. This is a significant issue for cnc machining aerospace parts, where an assembly may contain dozens of unique components.
- Underlying Cause: Basic neutral formats like older versions of STP may not support complex assembly hierarchies. The conversion flattens the entire structure into one file.
- Advanced Solutions:
- Export as Separate Bodies: A robust approach is to export each component of the assembly as its own individual STP file. The CAM programmer can then import these parts and manually re-assemble them in the CAM software.
- Use Updated Standards: Ensure you are exporting using a modern, well-supported STP protocol (e.g., AP214 or AP242), which is designed to handle more complex assembly information, including Product Manufacturing Information (PMI).
- Provide a Master File: Always send a master assembly file alongside the individual part files, so the machinist has a reference for how the parts fit together.
Challenge 4: The “Mess” of Units and Dimensions
- Specifics: A part designed in millimeters is imported into a CAM system set to inches, resulting in a model that is 25.4 times larger than intended. This is a common and easily avoidable error that impacts cnc precision machining.
- Underlying Cause: Many neutral formats do not explicitly store unit information in a way that is universally recognized. Software defaults can override the intended units.
- Advanced Solutions:
- Double-Check Before Export: Always verify that the units of your native CAD file match the intended manufacturing units.
- Communicate Clearly: Add a note to your technical drawings or in the email to the machinist stating “All units are in mm.” or “All units are in inches.”
- Standardize Workflows: For china cnc machining projects, where a shift from metric to imperial (or vice-versa) is common, standardize a workflow where the first step of any CAM setup is to verify and correct the model’s units.
Challenge 5: Loss of Non-Geometric Information
- Specifics: Critical information like surface roughness callouts, material properties, and Geometric Dimensioning and Tolerancing (GD&T) symbols disappear. This is a particularly serious issue for medical cnc machining and cnc machining for aerospace, where strict tolerances are mandatory.
- Underlying Cause: Neutral formats primarily focus on geometric data. Non-geometric data (metadata, annotations, etc.) is often stored in a separate, software-specific way.
- Advanced Solutions:
- Utilize PMI: The latest STP protocols (AP242) have advanced capabilities for embedding PMI directly into the 3D model. This is the most modern and recommended approach.
- Provide 2D Drawings: The traditional method is to accompany the 3D model with a complete 2D technical drawing that includes all necessary GD&T, surface finish, and material notes. This serves as the definitive reference document for the machinist.
- Communicate Directly: For complex parts, a phone call or email to the cnc precision machining parts provider to highlight specific tolerance requirements can prevent costly errors.
Part 3: Conclusion and Best Practices for a Seamless CAD-CAM Workflow
Mastering the intricacies of CAD files is not just about technical knowledge; it’s about building a robust and reliable workflow that minimizes errors and maximizes efficiency. For a business, this directly impacts the cnc machining cost and the quality of the final product. By adopting a systematic approach, you can bridge the gap between design and manufacturing, ensuring that your digital blueprint translates into a perfect physical part.
Best Practices Checklist: Building a Flawless Workflow
To streamline your cnc machining projects and avoid the common pitfalls discussed in this guide, consider the following checklist:
- Communicate Early and Often: Before even designing, speak with your cnc machining china provider. Confirm their preferred file formats (usually STP or a specific native format they support) and their unit preferences (mm or inches). This simple step can prevent most conversion headaches.
- Standardize Your Export Settings: Create a company-wide standard for exporting neutral files. Define the specific version of STP to use (e.g., AP214) and ensure everyone on the team follows the same procedure. Consistency is the key to predictable results, especially for large-scale production cnc machining.
- Validate Your Files Post-Conversion: Never assume a conversion was successful. After exporting a neutral file, open it in a different viewer or a CAM software to check for any visible errors, gaps, or feature losses. This quick verification step can save hours of rework later on.
- Embrace 2D Drawings as a Supplement: Even with a perfect 3D model, a 2D drawing remains the definitive legal document for manufacturing. Use it to clearly define critical dimensions, tolerances (GD&T), and material callouts, especially for complex parts like those in medical cnc machining.
- Simplify for Production: For the final production file, it’s often best to remove non-essential features like internal chamfers or complex fillets that are purely aesthetic. This simplifies the geometry, reduces file size, and makes the CAM programming process faster and more robust.
- Consider Material Properties and Cost: The choice of cnc machining materials significantly influences cnc machining price. Communicate your material choice (e.g., aluminium cnc machining, plastic cnc machining, or ceramic cnc machining) to your manufacturer early on, as this affects their tooling, setup, and overall quote.
The future of manufacturing is a fluid exchange of data between design and production. For professionals and businesses involved in precision cnc machining, mastering this digital language is not just an advantage—it is a fundamental requirement. By implementing these best practices, you can ensure a smooth, efficient, and cost-effective journey from design to a perfect finished part. Whether you’re working on a groundbreaking new product or a reliable cnc precision machining parts prototype, a robust CAD-CAM workflow is your greatest asset.